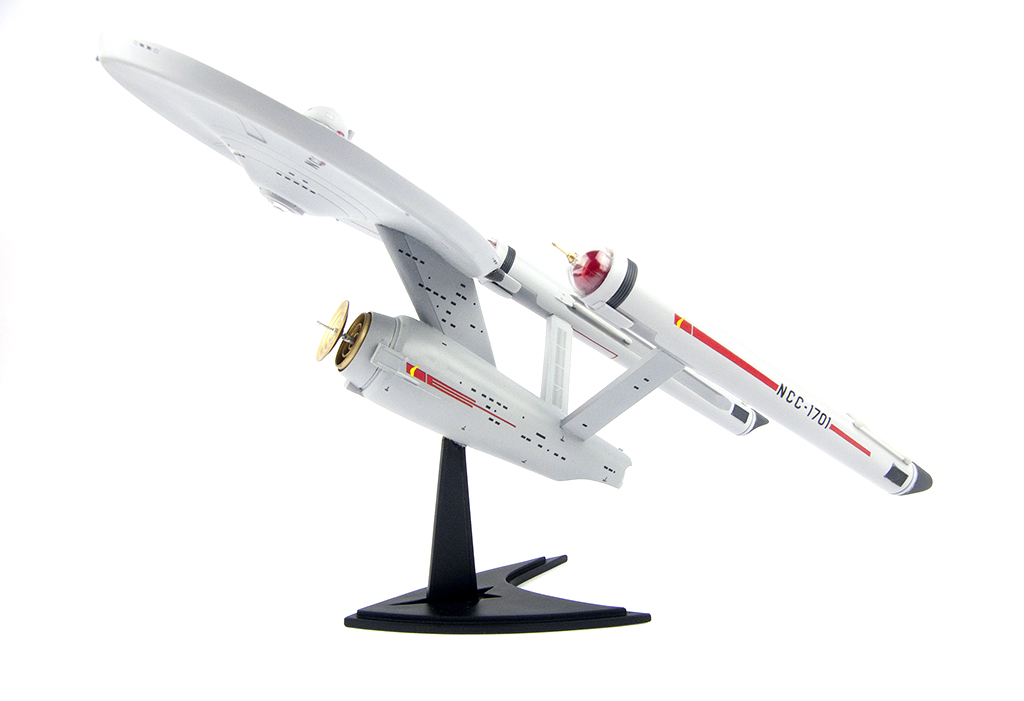
While it’s true that I’m primarily an aircraft modeller, I do like to dabble in sci-fi and fantasy subjects from time to time, and back in 2015, I found myself building the Polar Lights 1/1000 NCC-1701 Enterprise kit from Star Trek. I was never particularly happy with the supplied plastic stand however, and I can remember it breaking off from the kit at least once.
Fast forward to early this year, and I find myself preparing for a major house move, and scratching my chin over how to move all my built models. In checking my little Enterprise build, I noticed that the join of the stand into the hull was once again very tenuous, and definitely would not survive the move. I decided to take pre-emptive action, and carefully severed it from its base, with the idea of remounting it on a new one afterwards.
Here’s the damage after my emergency intervention:
The two plastic pins from the top of the kit’s stand have snapped off and become embedded in their mounting holes. The damage to the finish is from my previous attempt at a repair. Here’s the top of the kit stand:
It’s small and not particularly strong, and the model has been wobbly upon it since the day I finished it. Originally I was going to toss this away and just mount the kit on a new wooden base or plinth, but I didn’t have any nice ones to hand. Instead, the most suitable thing I had in stock was this cheap and slightly nasty MDF craft wood plaque:
I’ve used these things before, and they’re quite a bit of work to make look decent; the routed edges in particular are a super-absorbent PITA. However, I didn’t want this project to be long or complicated, and I was aiming for function over form, so I elected to make do. You can see that I’d already drilled a central mounting hole for the brass tubing I chose as the mounting pole.
The reason the plastic stand came in handy is because I decided to dress up the plain wooden base by mounting said plastic stand atop it. More of that later.
In keeping with my desire to keep things simple, I decided that the whole thing – wooden base, plastic adornment, and brass mounting pole – was going to be painted gloss black (in hindsight I should have chosen satin or even mat, but there you go). So I started with several coats of Rustoleum grey primer straight out of the rattle can, sanding between coats, eventually ending up with this:
Even now you can see that the routed edge is still a little rough, but I didn’t want to spend any longer on it. And I probably won’t be buying any more of this kind base again! (I do have a couple more in my stash, though.)
Setting the base aside, I started working on modifying the plastic stand, firstly by removing the upright section. This left an ugly mess that was going to be nearly impossible to clean up nicely, so I cloned the shape of the central cut-out with Tamiya tape, transferred it to some styrene sheet, cut it out, and glued it over the top of the mess:
In truth it took quite a bit of fettling with some sanding sticks to get the shape to fit properly, and I stopped well short of perfect. I also drilled a hole through it to accept the brass rod, which will obviously be aligned with the hole on the wooden base.
Speaking of the wooden base, I started applying coats of gloss black acrylic lacquer to it:
Looks OK from that angle, but unfortunately after a couple of passes, I started having a lot of trouble with spitting out of the rattle can, which in less favourable light looked like this:
So a couple of rounds of sanding and spraying later, I was able to put the pieces together and get this:
The plastic part was actually a little warped (exacerbating its wobbliness, no doubt), so I used JB Kwik Weld to secure it into position, with some 2KG dumbbells holding it down. Of course, the dumbbells marked the finish, so I had to give it another quick spray of the black!
My final task before mounting the model as to add some felt to the underside of the base, just so it wouldn’t mar any surface it was placed on:
Spray adhesive, press into place, trim with a blade. Pretty simple. The final job was to clean up the old mounting holes in the model, and drill a new one to accept the brass pole:
After taking that photo, I touched up the darker grey, added some JB Kwik Weld to the top of the brass pole, and slid the model into place:
This turned out to be a lot more work than I had planned on, but the result is certainly much more stable than it was before. The shiny black takes fingerprints like nobody’s business, and makes things a bit hard to see, but overall, I’m still pretty happy at having been able to save this model from certain destruction.
And here it is in place on the “sci-fi shelf” of my new display cabinet:
And that’s it! I think from now on I’m just going to replace this type of kit stand as a matter of course. I’ve made a few bases like this in the past, and they always look better than what you get in the kit, as well as being much more sturdy.
Now it’s back to the Mustang…


