I’m pleased to announce that Building the Airfix F6F-5 Hellcat in 1/24 Scale has been updated to v1.4, and for the next 7 days, will be available for just 12 Australian dollars. (Sale ends midnight, 6 February 2025, AEDT.)

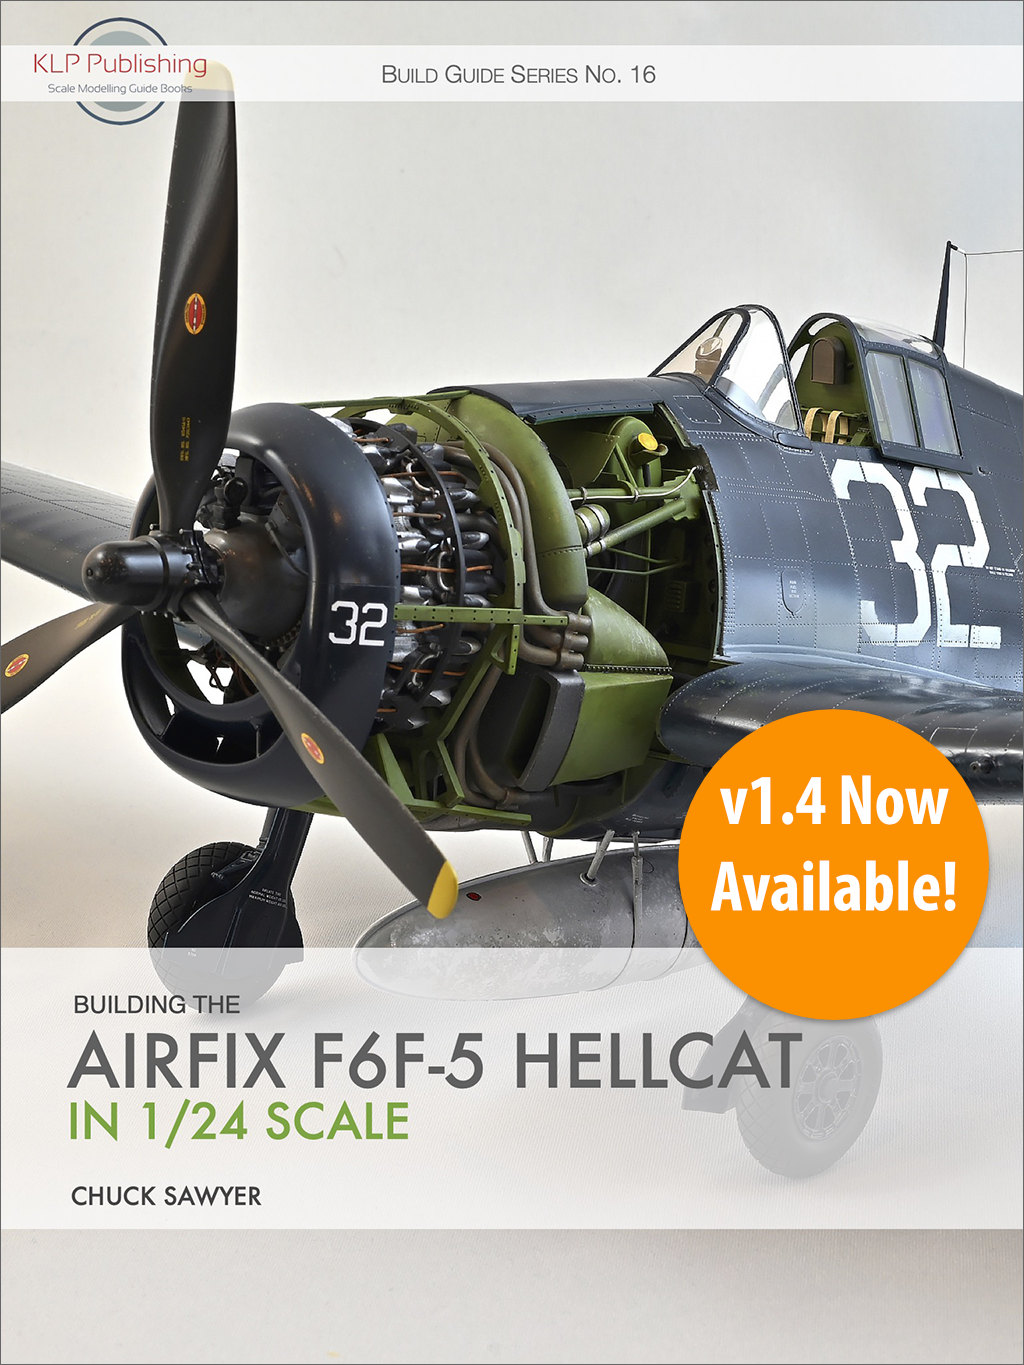
Building the Airfix F6F-5 Hellcat in 1/24 Scale
In this 263-page eBook, Chuck Sawyer executes a meticulous build of the Airfix 1/24 F6F-5 Hellcat, providing plenty of construction and painting hints and tips along the way. Chuck combines the kit with a selection of aftermarket upgrade parts and other refinements to produce a stunning result that is both inspirational and educational.
And as with all our books, should more aftermarket products or reference titles be released, or we discover errors that need correcting, we will update the book accordingly. Anyone who purchased the pre-update version gets lifetime free access to all subsequent updated versions! All new purchasers will of course receive the updated version automatically.
Note: all our prices are in Australian dollars.
v1.6 Now Available!
$18.00
This update consists of the usual typographical and layout improvements, plus an updated author profile.
This a free update for all existing purchasers, and of course new purchasers will always receive the latest version of any of our books. You can check the version number of your previously-purchased copy at the bottom of the Copyright page (iii).
In order to obtain your free update, simply re-download the book using either the original download link in your Order Confirmation email, or log in to your KLP account and download it from the Downloads section of your profile. If you don’t have either, please contact me and we’ll sort it out.
And of course, if you don’t have this one, for the next 7 days you can purchase it even more cheaply than usual!


You must be logged in to post a comment.